Tuesday, December 13, 2011

Nasi Liwet Solo

Hari Sabtu kemarin ini, dapat kiriman masakan nasi liwet dari seorang kenalan.
Siang itu suami saya jadi menikmati makan siang ala Indonesia. Saya jadi teringat bulan September lalu saya memasak nasi liwet ala Solo dan entah karena lupa dan kesibukan di dunia nyata, saya lupa niat saya mengarsipkan resep nasi liwet ini.
Tentunya saya tidak serajin pengirim nasi liwet yang meracik bumbunya sendiri. Nasi liwet yang saya buat, sebagian menggunakan bumbu instant. Namanya juga 'simple kitchen' senangnya yang praktis he..he..he..
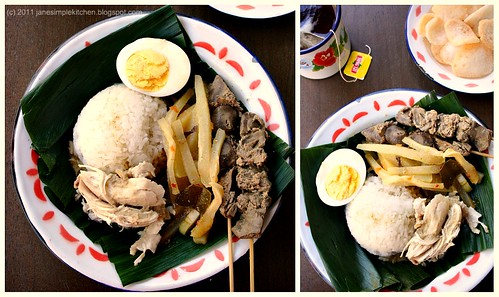
NasiLiwet Solo Collage


Panduan resep nasi liwet Solo ini saya ambil dari resep Ibu Ine di kolom resep multiply site beliau.
Link ke resep aslinya dapat diklik di SINI.

Berikut ini resep modifikasi saya, untuk ayamnya saya buat menggunakan bumbu instant opor merek Bangka 47 .


NASI GURIH
1 batang sereh dimemarkan
2 sdt garam
4 lembar daun salam
400 gram beras
800 mL santan (saya pakai 400 mL santan kaleng + 400 mL air)

Cara : Masukan semua bahan di rice cooker, seperti memasak nasi biasa. Jika menggunakan kompor biasa. Didihkan santan garam, sereh, daun salam. Setelah itu campur dengar beras yang telah dicuci bersih. Aduk-aduk sebentar, lalu kukus nasi sampai matang.

OPOR AYAM +TELUR + HATI AYAM
2 pounds dada ayam
1 pounds hati ayam
Telur rebus sesuai selera
2-3 bungkus bumbu Opor Ayam
Santan

Cara: masak sesuai petunjuk kemasan. Setelah matang. Sisihkan kuahnya. Suir-suir ayam yang telah matang. Potong-potong hati ayam lalu ditusuk dengan tusuk sate.

SAMBAL GORENG LABU SIAM
Idealnya, labu siam diiris memanjang, lalu direndam air kapur sirih supaya tidak terlalu lembek setelah dimasak. Tapi saya lewat nih langkah yang ini.

2 buah labu siam
3 sdm cabe merah giling
2 iris lengkuas
2 lembar daun salam
1 sdt gula
jika suka pedas bisa ditambah 1 genggam cabe rawit merah
kuah dari opor ayam di atas ambil sebagian

CARA:
Tumis cabe merah, lengkuas dan daun salam sampai harum, tambahkan kuah opor ayam, masukan labu siam iris, gula pasir. Masak hingga matang.

Di resep dari Ibu Ine ini ada teman nasi Liwet Solo yang khas seperti kumut (santan kental yang dimasak dengan putih telur) dan telur dadar tim/kukus. Tapi kali ini saya tidak sempat membuat keduanya.

Cara Penyajian :
Nasi sepincuk (dialas daun pisang) ditambahkan sayur labu dan sedikit kuah, ayam suir dan telur. Siram dengan sedikit kuah dari opor tadi. Nikmati dengan sate ati ayam.
Saya paling suka makan dengan kerupuk, jadilah kerupuk udang yang kriuk-kriuk menemani nasi liwet ala saya ini.

Nasi Liwet Solo


Monday, September 19, 2011

Nostalgia

I missed my previous blog...I don't know why I opened my old blog, and enjoyed them. I just want to put their links here as a reminiscence.

All recipes in these links are in Indonesian language.


Recipes at Reviresco Life's Corner

When the word "nostalgia" popped up in my mind...I remember this song.
This song is about people who is remembering and reminiscing high school season in their life. When she met her beloved one at school.


Wednesday, September 14, 2011

Arugula Salad with Red Beans & Mandarin Orange

Summer is almost ended. If I may choose, I want warm/hot weather as summer time with foliage like autumn season has. I still feel like to eat fresh veggie and fruit...Don't want to end this summer.

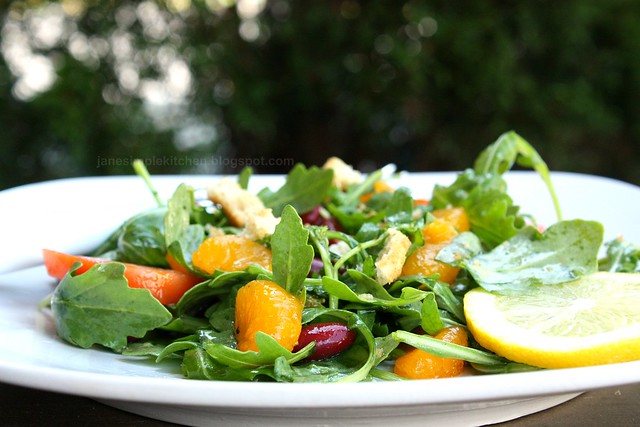
I made simple salad with arugula, red beans, mandarin orange and tomato. I made simple dressing for this salad. Combination of spicy arugula with nutty taste from the beans and some sweetness from the orange are so lovely. Love it...


Ingredients :
Baby Arugula (about 2 handfuls )
Canned Red beans ( drain, wash, rinse) -- about 3-4 tbsp
Canned Mandarin Orange ( drain the syrup)
Crouton (crushed to add some crunchy texture)
Shredded Parmesan Cheese --- 1 -2 tbsp
Plum tomato - sliced

Dressing :
2 tbsp olive oil
1 tbsp honey balsamic vinaigrette
1 tbsp lemon juice
salt & pepper to taste
(whisk all the ingredients of the dressing)

Put all the veggie and beans in a bowl, pour the dressing over them. Toss them. Sprinkle with parmesan cheese and crushed crouton.

Ready to enjoy...

Arugula Salad with Red Beans and Mandarin Orange

Saturday, September 10, 2011

Baking Cake with Rice Cooker


I bought a new rice cooker. After reading lots of reviews, I decided to buy Sanyo brand rice cooker. Instead of buying $200 rice cooker from leading brand, I got micro-computerized rice cooker with reasonable price.

One of reviewer at Amazon.com said that she made a cake using baking function from this rice cooker. I tried the same thing, from manual book I read that it can be used for any cake mix box. This is a short cut for making my son's 2nd birthday cake.


I was worry after pouring out the batter to the inner pan and push baking button on the rice cooker. After waiting for about 55 minutes...voila..a nice thick cake was produced by this rice cooker. So happy I got multifunctions rice cooker...


My son and I had a great time decorating the cake. My son was so excited to put all the M&M chocolate milk over the ganache frosting I made. Love you son....


Encouraging Myself to Cook

My previous post was about my kitchen blues last August.
At the end of August, I really needed to motivate my self to cook again.
My son would have his birthday on August 25th....I wanted to make something for him.
Sometimes to increase my mood of cooking, I love to see something cute, crafty and lovely.
Just to give some treat for my eyes :-)

Abe's art

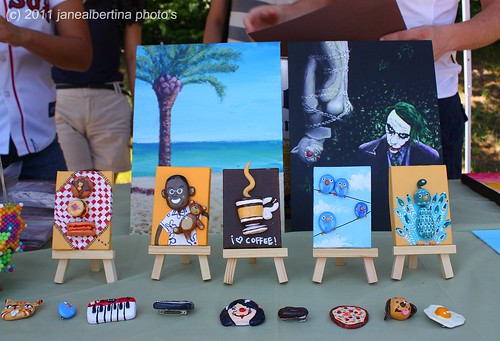
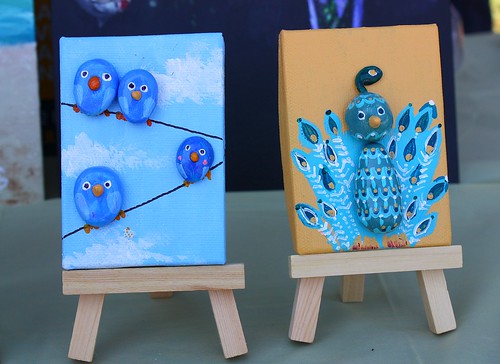
I opened my pics when I went to a food bazaar at the end of July, and I saw some cute stuff from a Bostonian student. Her name is Abe. She made mini painting with clay creations and also she made a lovely bottle art, she called it "Say It with a bottle".
You can see it more detail on her blog , just click HERE.

Abe's mini painting with clay creation

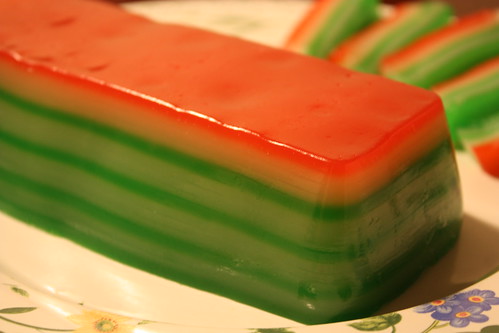
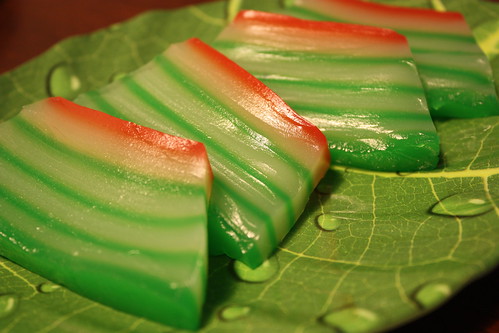
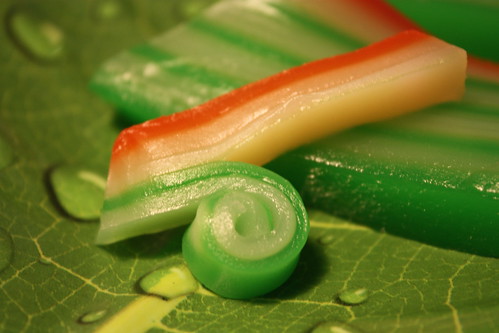
Finally I find my spirit of cooking again...yay I was making tapioca layer steam cake (lapis sagu). It was time consuming (more than 1 hour making time, and we have to do it layer by layer). But after seeing the beautiful colorful layer of this cake I just felt happy.


Lapis Sagu

I got this recipe from Ibu Estherlita, from her multiply blog (www.estherlita.multiply.com).

750 mL thick coconut milk
200 mL thin coconut milk
100 mL condensed milk
500 gr tapioca flour
2 tbsp sweet rice flour
400 gr sugar
1 tsp salt
1/2 tsp vanilla
food coloring and food essence according to our preference (usually Pandan paste)

lapis sagu 2

Directions:

Warm the milk and coconut milk, add sugar and salt.
Put the milk mixture into the flour, stir and mix until smooth. Prepare the steamer. Grease the pan that we will use to steam, with some vegetable oil. Cook every layer, about 10 minutes. I was using mini loaf silicon pan. And I just made half of the amount of the recipe. We need to cook every layer perfectly so we can pull layer by layer when we eat them. After all the layer done, steam again about 20 minutes.


Lapis sagu


Kitchen Blues

Is that really a term to describe how lazy I am to cook.
I don't know why August was so blue....I just cook ordinary dishes and simple.
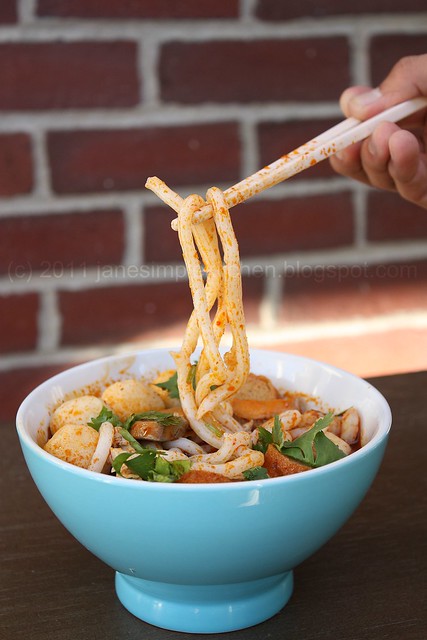
One of them was tom yum soup with udon noodle.

Tom Yum Udon

I just used instant tom yum soup in a jar. I scoped and put it into the boiling water.
Added some fish ball and fish cake, lastly added some shrimp.
I also prepared a bowl of cooked udon noodle. Pour out the soup into the noodle, garnish with some cilantro and it's ready to enjoy.

Simple dishes for my kitchen blue days...

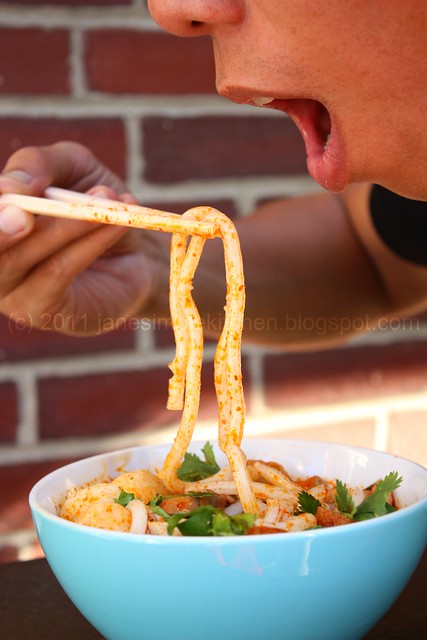
I also asked my husband to be my model...just want to try new style of taking food picture.

Tom Yum Udon


Monday, July 25, 2011

Grass Jelly Drink

I can feel the heat and spirit of summer. My son loves to play outside *Of course after months playing inside the house during winter time* One day he played ball and bubbles excitedly. He might want to be a soccer player ^_^.

Jev with bubbles and balls

Jev with bubbles and ball 2

On a hot and sunny day, usually I need something cooling and refreshing.
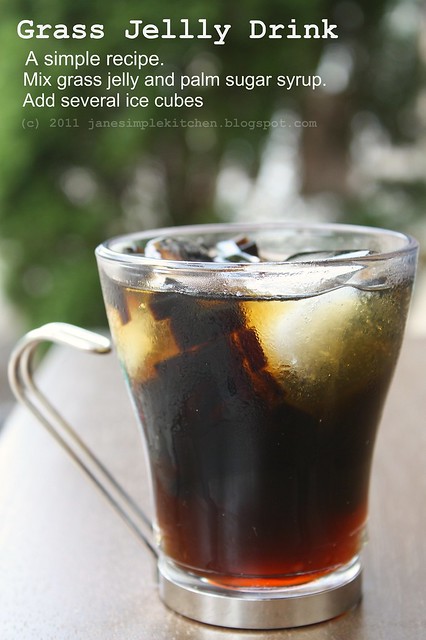
Grass Jelly with ice cube and palm sugar syrup with Pandan Leaves flavor is very satisfying for me.

Grass jelly is made by boiling the aged and slightly oxidized stalks and leaves of Mesona chinensis[1][2] (member of the mint family) with potassium carbonate for several hours with a little starch and then cooling the liquid to a jelly-like consistency.[1][3] This jelly can be cut into cubes or other forms, and then mixed with syrup to produce a drink or dessert thought to have cooling (yin) properties, which makes it typically consumed during hot weather. The jelly itself has a slight bitter taste, a light iodine lavender flavor, and is a translucent black. It can also be mixed with soy milk to produce a milky white liquid with black strands in it. (Source : Wikipedia)

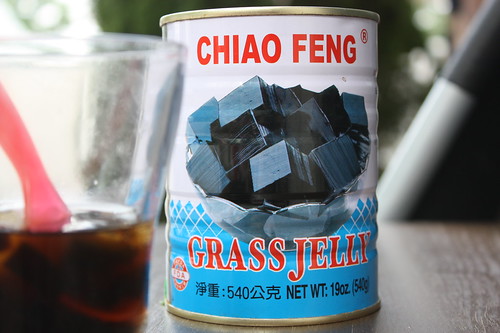
A can of Grass Jelly


Ingredients :
1 can grass Jelly, cut into small cubes

Syrup :
6 tbsp of sugar
125 grams of palm sugar
2 pandan leaves
Water

Method:
Prepare the syrup by dissolve sugar into boiling water (eye ball the amount of water), and also put pandan leaves into the mixture. Let it cool.

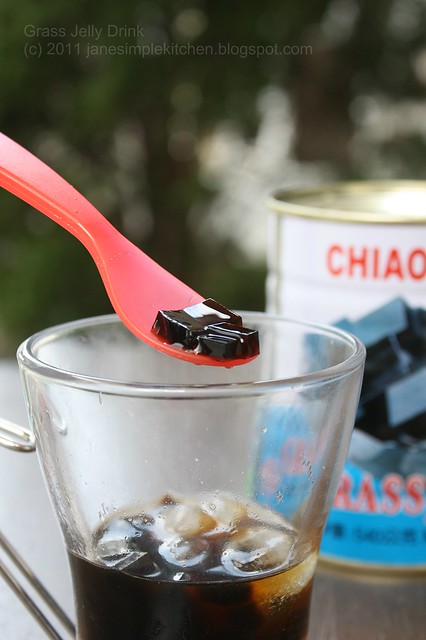
Mix grass jelly with the syrup, add ice cube or crushed ice.

Grass Jelly Drink2

Grass Jelly Drink


Friday, July 1, 2011

Colorful Rum Ball

Last Monday we went to Hampton Beach to see Sand Sculpture Exhibition. On the way to the beach there were some stores who sell colorful summer dresses. They displayed the dresses near the road. They hung the mannequin along their deck. I just loved the color. It looks so festive.

Warna Warni
Inspired by their festivity...I remember my colorful chocolate sprinkle (meises Ceres from Indonesia). I've planned to make rum ball to use left over whipped cream that will be expired soon. I use colorful sprinkle instead of regular chocolate sprinkle.

INGREDIENTS :
Any cake (yellow cake, or chocolate cake)
whipped cream
chocolate chips
rum

METHOD :
1. Crush all the cake using food processor until it become powdery. Set aside.
2. Make ganache : 1:1( whipped cream : chocolate chips) : Heat them in microwave, 30 seconds and stir, repeat this step until all melted and blended.
3. Mix no.1 with ganache and rum, using food processor until they become like dough and easy to be formed. Just eye ball the amount of ganache you'll use.
4. Form the mixture into small ball ( 1 tbs), roll into chocolate sprinkle. Put the ball in paper cup. Put in the fridge 1-2 hours to make it firm.

rum ball


You may also like :

Related Posts with Thumbnails